Flachluftlager werden typischerweise mit einer Vorspannung wie unten beschrieben konfiguriert. Montagekomponenten dienen zur Positionierung und Montage der Lager. Luftlagerhersteller
Entwurfs- und Installationsanleitung für Luftbuchsen
Flachluftlager werden typischerweise mit einer Vorspannung wie unten beschrieben konfiguriert. Montagekomponenten dienen zur Positionierung und Montage der Lager. Luftlagerhersteller
Flachluftlager werden typischerweise mit einer Vorspannung wie unten beschrieben konfiguriert. Montagekomponenten dienen zur Positionierung und Montage der Lager. Luftlagerhersteller
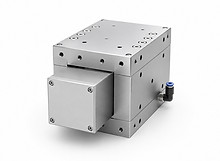
Typische Konfigurationen
Flachluftlager werden typischerweise mit einer Vorspannung wie unten beschrieben konfiguriert. Montagekomponenten dienen zur Positionierung und Montage der Lager. Luftlagerhersteller

Flachluftlager werden typischerweise mit einer Vorspannung wie unten beschrieben konfiguriert. Montagekomponenten dienen zur Positionierung und Montage der Lager. Luftlagerhersteller
Flachluftlager werden typischerweise mit einer Vorspannung wie unten beschrieben konfiguriert. Montagekomponenten dienen zur Positionierung und Montage der Lager. Luftlagerhersteller
Flachluftlager werden typischerweise mit einer Vorspannung wie unten beschrieben konfiguriert. Montagekomponenten dienen zur Positionierung und Montage der Lager. Luftlagerhersteller
Flachluftlager werden typischerweise mit einer Vorspannung wie unten beschrieben konfiguriert. Montagekomponenten dienen zur Positionierung und Montage der Lager. Luftlagerhersteller
Flachluftlager werden typischerweise mit einer Vorspannung wie unten beschrieben konfiguriert. Montagekomponenten dienen zur Positionierung und Montage der Lager. Luftlagerhersteller
Flachluftlager werden typischerweise mit einer Vorspannung wie unten beschrieben konfiguriert. Montagekomponenten dienen zur Positionierung und Montage der Lager. Luftlagerhersteller
Flachluftlager werden typischerweise mit einer Vorspannung wie unten beschrieben konfiguriert. Montagekomponenten dienen zur Positionierung und Montage der Lager. Luftlagerhersteller
Flachluftlager werden typischerweise mit einer Vorspannung wie unten beschrieben konfiguriert. Montagekomponenten dienen zur Positionierung und Montage der Lager. Luftlagerhersteller
Flachluftlager werden typischerweise mit einer Vorspannung wie unten beschrieben konfiguriert. Montagekomponenten dienen zur Positionierung und Montage der Lager. Luftlagerhersteller
Konstruktions- und Installationshandbücher
- Rollenluftlager
- Schubluftlager
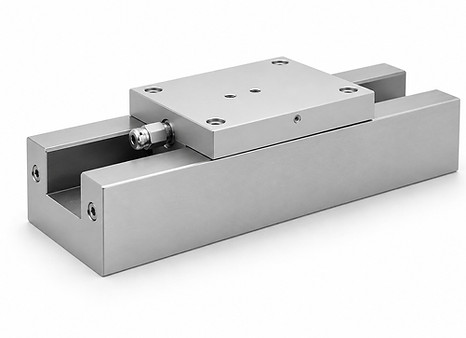
- Luftbuchse
- Flache Luftlager
Flachluftlager werden typischerweise mit einer Vorspannung wie unten beschrieben konfiguriert. Montagekomponenten dienen zur Positionierung und Montage der Lager. Luftlagerhersteller
Flachluftlager werden typischerweise mit einer Vorspannung wie unten beschrieben konfiguriert. Montagekomponenten dienen zur Positionierung und Montage der Lager. Luftlagerhersteller
Typische Konfigurationen
Flachluftlager werden typischerweise mit einer Vorspannung wie unten beschrieben konfiguriert. Montagekomponenten dienen zur Positionierung und Montage der Lager. Luftlagerhersteller
Flachluftlager werden typischerweise mit einer Vorspannung wie unten beschrieben konfiguriert. Montagekomponenten dienen zur Positionierung und Montage der Lager. Luftlagerhersteller
Flachluftlager werden typischerweise mit einer Vorspannung wie unten beschrieben konfiguriert. Montagekomponenten dienen zur Positionierung und Montage der Lager. Luftlagerhersteller
Flachluftlager werden typischerweise mit einer Vorspannung wie unten beschrieben konfiguriert. Montagekomponenten dienen zur Positionierung und Montage der Lager. Luftlagerhersteller
Flachluftlager werden typischerweise mit einer Vorspannung wie unten beschrieben konfiguriert. Montagekomponenten dienen zur Positionierung und Montage der Lager. Luftlagerhersteller
Flachluftlager werden typischerweise mit einer Vorspannung wie unten beschrieben konfiguriert. Montagekomponenten dienen zur Positionierung und Montage der Lager. Luftlagerhersteller
Flachluftlager werden typischerweise mit einer Vorspannung wie unten beschrieben konfiguriert. Montagekomponenten dienen zur Positionierung und Montage der Lager. Luftlagerhersteller
Flachluftlager werden typischerweise mit einer Vorspannung wie unten beschrieben konfiguriert. Montagekomponenten dienen zur Positionierung und Montage der Lager. Luftlagerhersteller
Flachluftlager werden typischerweise mit einer Vorspannung wie unten beschrieben konfiguriert. Montagekomponenten dienen zur Positionierung und Montage der Lager. Luftlagerhersteller
Flachluftlager werden typischerweise mit einer Vorspannung wie unten beschrieben konfiguriert. Montagekomponenten dienen zur Positionierung und Montage der Lager. Luftlagerhersteller
Flachluftlager werden typischerweise mit einer Vorspannung wie unten beschrieben konfiguriert. Montagekomponenten dienen zur Positionierung und Montage der Lager. Luftlagerhersteller
Flachluftlager werden typischerweise mit einer Vorspannung wie unten beschrieben konfiguriert. Montagekomponenten dienen zur Positionierung und Montage der Lager. Luftlagerhersteller
Flachluftlager werden typischerweise mit einer Vorspannung wie unten beschrieben konfiguriert. Montagekomponenten dienen zur Positionierung und Montage der Lager. Luftlagerhersteller
Typische Konfigurationen
Flachluftlager werden typischerweise mit einer Vorspannung wie unten beschrieben konfiguriert. Montagekomponenten dienen zur Positionierung und Montage der Lager. Luftlagerhersteller
Flachluftlager werden typischerweise mit einer Vorspannung wie unten beschrieben konfiguriert. Montagekomponenten dienen zur Positionierung und Montage der Lager. Luftlagerhersteller
Flachluftlager werden typischerweise mit einer Vorspannung wie unten beschrieben konfiguriert. Montagekomponenten dienen zur Positionierung und Montage der Lager. Luftlagerhersteller
Flachluftlager werden typischerweise mit einer Vorspannung wie unten beschrieben konfiguriert. Montagekomponenten dienen zur Positionierung und Montage der Lager. Luftlagerhersteller
Flachluftlager werden typischerweise mit einer Vorspannung wie unten beschrieben konfiguriert. Montagekomponenten dienen zur Positionierung und Montage der Lager. Luftlagerhersteller
Flachluftlager werden typischerweise mit einer Vorspannung wie unten beschrieben konfiguriert. Montagekomponenten dienen zur Positionierung und Montage der Lager. Luftlagerhersteller
Flachluftlager werden typischerweise mit einer Vorspannung wie unten beschrieben konfiguriert. Montagekomponenten dienen zur Positionierung und Montage der Lager. Luftlagerhersteller
Flachluftlager werden typischerweise mit einer Vorspannung wie unten beschrieben konfiguriert. Montagekomponenten dienen zur Positionierung und Montage der Lager. Luftlagerhersteller
Flachluftlager werden typischerweise mit einer Vorspannung wie unten beschrieben konfiguriert. Montagekomponenten dienen zur Positionierung und Montage der Lager. Luftlagerhersteller
Flachluftlager werden typischerweise mit einer Vorspannung wie unten beschrieben konfiguriert. Montagekomponenten dienen zur Positionierung und Montage der Lager. Luftlagerhersteller
Flachluftlager werden typischerweise mit einer Vorspannung wie unten beschrieben konfiguriert. Montagekomponenten dienen zur Positionierung und Montage der Lager. Luftlagerhersteller
Flachluftlager werden typischerweise mit einer Vorspannung wie unten beschrieben konfiguriert. Montagekomponenten dienen zur Positionierung und Montage der Lager. Luftlagerhersteller
Typische Konfigurationen
Flachluftlager werden typischerweise mit einer Vorspannung wie unten beschrieben konfiguriert. Montagekomponenten dienen zur Positionierung und Montage der Lager. Luftlagerhersteller
Flachluftlager werden typischerweise mit einer Vorspannung wie unten beschrieben konfiguriert. Montagekomponenten dienen zur Positionierung und Montage der Lager. Luftlagerhersteller
Flachluftlager werden typischerweise mit einer Vorspannung wie unten beschrieben konfiguriert. Montagekomponenten dienen zur Positionierung und Montage der Lager. Luftlagerhersteller
Flachluftlager werden typischerweise mit einer Vorspannung wie unten beschrieben konfiguriert. Montagekomponenten dienen zur Positionierung und Montage der Lager. Luftlagerhersteller
Flachluftlager werden typischerweise mit einer Vorspannung wie unten beschrieben konfiguriert. Montagekomponenten dienen zur Positionierung und Montage der Lager. Luftlagerhersteller
Flachluftlager werden typischerweise mit einer Vorspannung wie unten beschrieben konfiguriert. Montagekomponenten dienen zur Positionierung und Montage der Lager. Luftlagerhersteller
Flachluftlager werden typischerweise mit einer Vorspannung wie unten beschrieben konfiguriert. Montagekomponenten dienen zur Positionierung und Montage der Lager. Luftlagerhersteller
Flachluftlager werden typischerweise mit einer Vorspannung wie unten beschrieben konfiguriert. Montagekomponenten dienen zur Positionierung und Montage der Lager. Luftlagerhersteller
Flachluftlager werden typischerweise mit einer Vorspannung wie unten beschrieben konfiguriert. Montagekomponenten dienen zur Positionierung und Montage der Lager. Luftlagerhersteller
Flachluftlager werden typischerweise mit einer Vorspannung wie unten beschrieben konfiguriert. Montagekomponenten dienen zur Positionierung und Montage der Lager. Luftlagerhersteller
Flachluftlager werden typischerweise mit einer Vorspannung wie unten beschrieben konfiguriert. Montagekomponenten dienen zur Positionierung und Montage der Lager. Luftlagerhersteller
Flachluftlager werden typischerweise mit einer Vorspannung wie unten beschrieben konfiguriert. Montagekomponenten dienen zur Positionierung und Montage der Lager. Luftlagerhersteller
Flachluftlager werden typischerweise mit einer Vorspannung wie unten beschrieben konfiguriert. Montagekomponenten dienen zur Positionierung und Montage der Lager. Luftlagerhersteller
Typische Konfigurationen
Flachluftlager werden typischerweise mit einer Vorspannung wie unten beschrieben konfiguriert. Montagekomponenten dienen zur Positionierung und Montage der Lager. Luftlagerhersteller
Flachluftlager werden typischerweise mit einer Vorspannung wie unten beschrieben konfiguriert. Montagekomponenten dienen zur Positionierung und Montage der Lager. Luftlagerhersteller
Flachluftlager werden typischerweise mit einer Vorspannung wie unten beschrieben konfiguriert. Montagekomponenten dienen zur Positionierung und Montage der Lager. Luftlagerhersteller
Flachluftlager werden typischerweise mit einer Vorspannung wie unten beschrieben konfiguriert. Montagekomponenten dienen zur Positionierung und Montage der Lager. Luftlagerhersteller
Flachluftlager werden typischerweise mit einer Vorspannung wie unten beschrieben konfiguriert. Montagekomponenten dienen zur Positionierung und Montage der Lager. Luftlagerhersteller
Flachluftlager werden typischerweise mit einer Vorspannung wie unten beschrieben konfiguriert. Montagekomponenten dienen zur Positionierung und Montage der Lager. Luftlagerhersteller
Flachluftlager werden typischerweise mit einer Vorspannung wie unten beschrieben konfiguriert. Montagekomponenten dienen zur Positionierung und Montage der Lager. Luftlagerhersteller
Flachluftlager werden typischerweise mit einer Vorspannung wie unten beschrieben konfiguriert. Montagekomponenten dienen zur Positionierung und Montage der Lager. Luftlagerhersteller
Flachluftlager werden typischerweise mit einer Vorspannung wie unten beschrieben konfiguriert. Montagekomponenten dienen zur Positionierung und Montage der Lager. Luftlagerhersteller